Enable port forwarding for the Wolflink HC5661-Wolflink

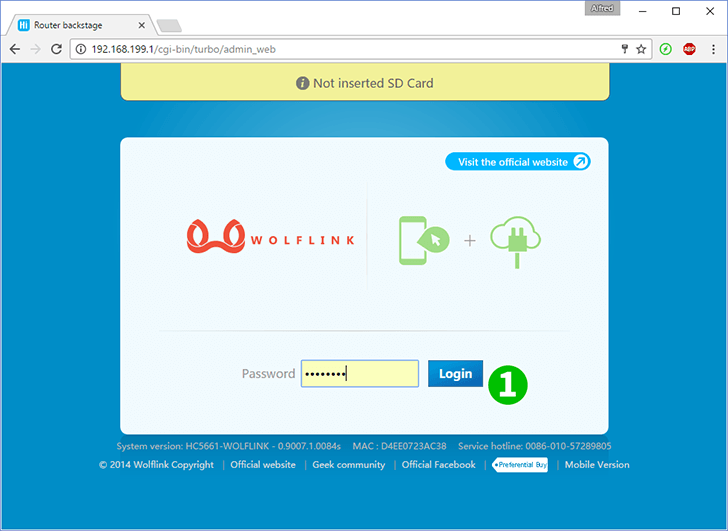
1 Log into wolflink router with your password (default IP: 192.168.199.1 or you can use http address: wolflinks.com. Default password: admin)

2 Click on "Advanced settings" at the start router page

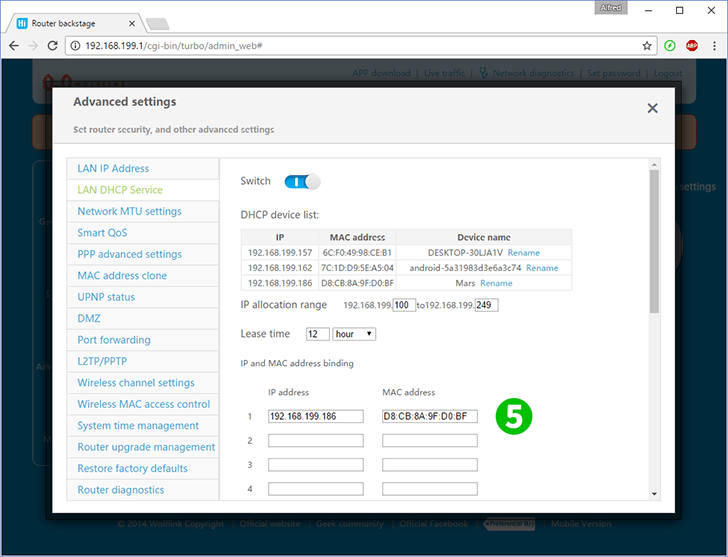
3 Choose "LAN DHCP Service" to setup statical IP address for your computer or skip to step 6 if you have it already

4 There are a list of connected clients. Find your computer

5 Copy your computer IP and MAC addresses into corresponding fields and press "Save" at bottom (Now your computer will have a statical IP address)

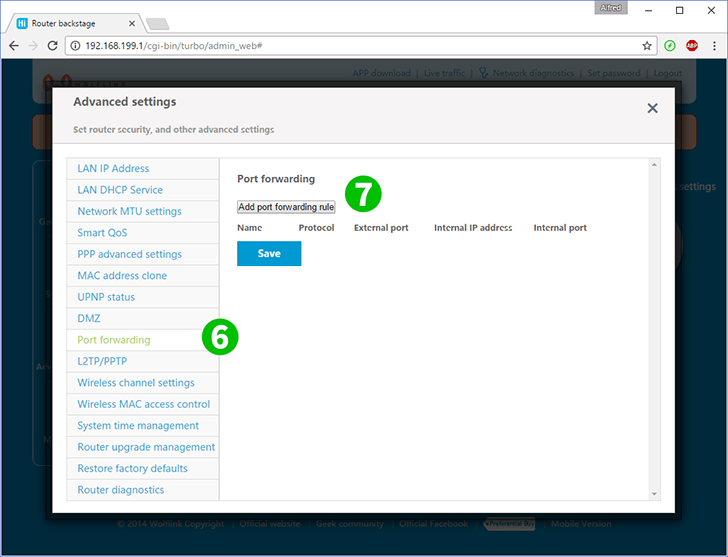
6 Choose "Port forwarding"
7 Click on "Add port forwarding rule"

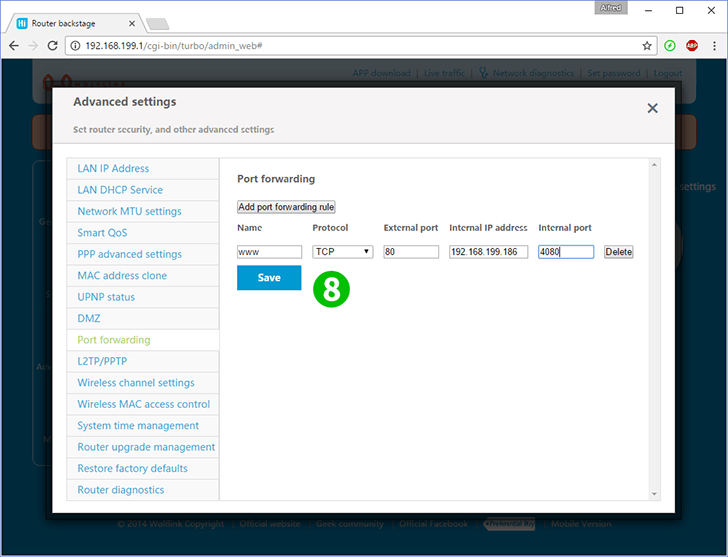
8 Fill the fields:
"Name" - any name you would like for this rule
"Protocol" - (TCP or UDP) for webserver choose TCP
"External port" - router port which will be accept connections from Internet (80 for webserver)
"Internal IP address" - statical IP address your computer with webserver (you can set or check it at step 3)
"Internal port" - your computer webserver port (80)
Press "Save"
Port forwarding is now configured for your computer!